Can I Build My Own DIY Solar Ground Mount Rack?

Time:2026-10-10 Author:Liam
0%

As solar deployment accelerates, many property owners ask, “Can I build my own DIY solar ground mount rack?” The answer is technically possible, but it depends on engineering, local conditions, and safe installation practices.

The International Energy Agency reported that global solar photovoltaic additions reached about 420 gigawatts in 2023. This growth makes residential ground-mounted systems increasingly accessible. However, more panels do not make structural design simpler. A rack must resist wind uplift, snow loads, corrosion, and uneven soil. Small errors can become expensive failures.

Start with the ground.

The National Renewable Energy Laboratory’s PVWatts guidance emphasizes accurate system orientation, shading analysis, and site-specific production estimates. Those checks should happen before buying steel or concrete. A level backyard may still contain expansive clay, buried utilities, or drainage problems. I have seen many DIY plans focus on panel spacing while ignoring foundation depth.

That is a weak starting point.

This guide examines material selection, tilt angle, post spacing, grounding, and permit considerations. It also explains when a prefabricated rack or professional engineer is the wiser choice. The U.S. Solar Energy Industries Association and Wood Mackenzie continue reporting strong solar-market growth, but market growth does not remove technical responsibilities.

A homemade rack can reduce labor costs. It can also create hidden risks. Review manufacturer specifications, local building requirements, and electrical standards before construction. If calculations feel uncertain, stop and seek qualified help. A careful design should survive a storm, protect the modules, and remain serviceable for decades.
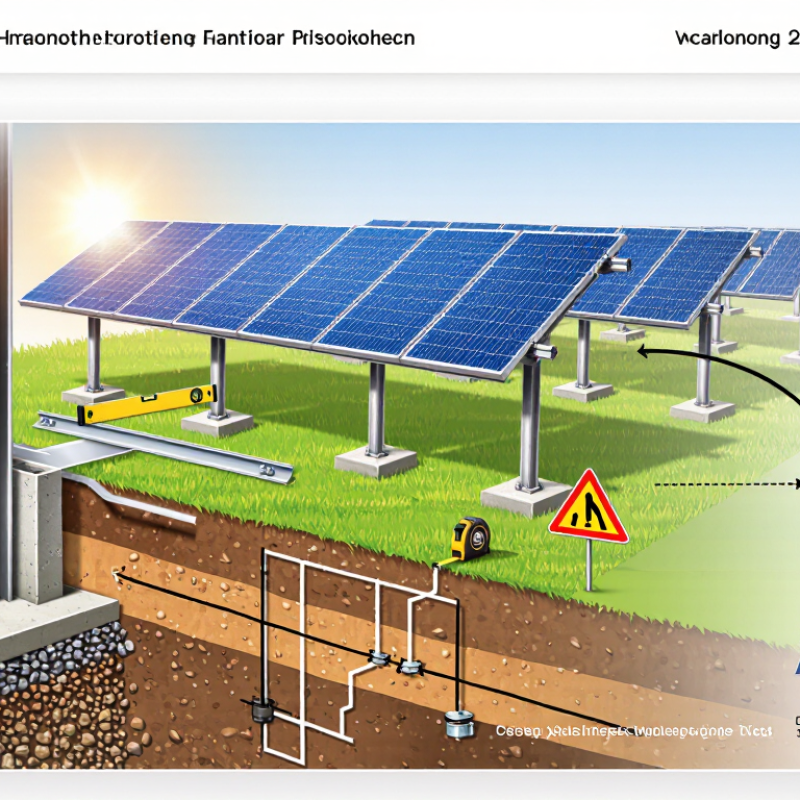
Can I Build My Own DIY Solar Ground Mount Rack?

What Is a DIY Solar Ground Mount Rack?

A DIY solar ground mount rack is a freestanding structure that holds solar panels above the ground. Unlike a roof system, it uses posts, rails, braces, and concrete footings. The rack keeps panels at a planned angle and leaves space underneath for airflow and maintenance. In practical work, the hardest part is often not assembling the frame. It is preparing level, stable ground.

A good design must handle panel weight, wind, snow, rain, and seasonal movement. Steel or aluminum can work, but material strength and corrosion resistance matter. Posts should be aligned carefully, because small errors become obvious when several panels meet. I once underestimated soil softness during planning. That mistake showed me why a soil check should happen before buying materials. Check local building and electrical requirements, and ask a qualified professional to review structural connections when needed.

Tips: Mark the panel layout with stakes and string first. Watch shadows from trees, fences, and nearby buildings throughout the year. Keep cables protected from sharp edges and standing water. Leave enough working space around the rack. Do not assume a simple frame is automatically safe; a strong-looking structure can still fail under changing weather. Record measurements, bolt sizes, and footing depths as you build. Some details may need revision after the first test fit.

How to Plan the Site, Size, and Structural Design

Can I Build My Own DIY Solar Ground Mount Rack?

A ground-mounted solar rack begins with the site, not the panels. I would watch the proposed area for a full day, noting shade from trees, buildings, and fences. Morning sunlight can look excellent, while afternoon shadows quietly reduce production. Measure the slope, drainage, and distance from the electrical connection. A simple compass, tape measure, and level provide useful first data. Still, my first layout would not be trusted without checking seasonal shadows.

Panel sizing affects every structural decision. Count the modules, then draw their exact dimensions on graph paper. Leave space for clamps, wiring, cleaning, and thermal movement. A low rack may be easier to access, but taller supports can improve clearance over grass and snow. Use the manufacturer’s installation limits for allowable mounting zones. Do not guess the spacing between rails. Small errors can concentrate stress around the panel frame.

Tips: Check local permits and setback rules before digging. Identify buried utilities. Ask a qualified structural professional to review footing depth, steel or wood selection, and wind and snow loads. Concrete footings need stable soil, correct alignment, and enough curing time. I once underestimated drainage on a sloped site; water collected beside one post after heavy rain. That mistake changed the design. Use corrosion-resistant fasteners, protect cable runs from animals, and inspect every connection after the first strong wind. DIY can work, but careful measurements matter more than confidence.

Which Materials and Tools Are Needed?

Building a DIY solar ground mount starts with the right materials, not the panels. Use galvanized steel or treated structural timber for the frame, stainless steel fasteners, and weather-resistant brackets. Concrete footings provide stability, especially in loose soil or windy areas. You may also need grounding hardware, conduit, cable clips, and protective caps for exposed edges.

Useful tools include a tape measure, shovel or post-hole auger, level, drill, socket set, torque wrench, and adjustable wrench. A string line helps keep the posts aligned. Wear gloves, eye protection, and sturdy footwear. I underestimated how difficult accurate post spacing could be. My first layout leaned slightly, so I had to reset one footing before the concrete cured.

Tips: Check local wind, snow, soil, and electrical requirements before digging. Mark underground utilities carefully. Use a torque wrench instead of guessing fastener tightness. Leave enough clearance beneath the panels for mowing, drainage, and airflow. Two people make panel lifting safer. A qualified structural or electrical professional should review uncertain connections, grounding, and load calculations. Small mistakes become expensive later.

How to Build and Install the Ground Mount Rack

Can I build my own DIY solar ground mount rack? Yes, but the installation starts with the site, not the panels. Mark a level footprint and check soil depth, drainage, frost movement, and seasonal shade. A compass and a noon-time shadow check can reveal problems that online maps miss. IEA PVPS reported global photovoltaic capacity above 1.6 terawatts by the end of 2023, increasing pressure for dependable installations. DIY does not mean casual.

How to build and install the ground mount rack begins with a structural plan. Calculate panel weight, wind exposure, snow load, and the array’s tilt angle. Use corrosion-resistant fasteners and concrete footings sized for local soil conditions.

The U.S. National Renewable Energy Laboratory reports a median photovoltaic degradation rate near 0.5% annually, so a rigid frame protects long-term production. Keep the lower panel edge high enough for mowing and drifting snow. Leave service space behind the array.

Install the posts squarely before attaching rails. A laser level helps, but verify measurements manually. Tighten every connection to the manufacturer’s specified torque. Loose hardware is easy to overlook. Bond and ground metal parts according to applicable electrical requirements, then protect underground wiring in approved conduit. Local permits, utility rules, and inspection requirements still apply. A licensed professional should review uncertain structural or electrical work.

My caution is simple: a slightly imperfect angle is tolerable; an undersized footing is not.

How to Secure, Wire, and Inspect the Solar Array

A DIY solar ground mount can work well, but the array must remain stable through wind, rain, and seasonal soil movement. Set each post in compacted ground or concrete, according to local structural requirements. Use corrosion-resistant hardware, lock washers, and measured spacing between rails. I once placed two supports too close together, which caused slight rail flexing. Rechecking the layout early prevented a larger repair later.

Secure every panel before wiring. Keep cables beneath the modules, away from sharp metal edges and standing water. Use outdoor-rated clips or conduit, and leave a small service loop near each connection. Never let connectors rest directly on the soil. Label each circuit clearly. A qualified electrician should verify grounding, overcurrent protection, disconnects, and the connection to the building system. These checks are not optional details.

Tips: Photograph the rack before covering trenches. Test cable polarity with a suitable meter. Inspect every connector for moisture, loose pins, or cracked seals. Walk around the array after strong winds and check for movement, lifted hardware, or sagging wires. Do not rely on appearance alone. A neat installation can still hide a loose ground connection. Record torque readings, inspection dates, and any changes. I would also leave extra conduit capacity, because future repairs rarely follow the original plan.

FAQS

What is a DIY solar ground mount rack?

It is a freestanding frame for holding solar panels above the ground. Posts, rails, braces, and concrete footings support the array. The structure allows airflow and maintenance underneath. It is not automatically safe.

Can I build a ground-mounted solar rack myself?

Yes, if you understand the site and structural requirements. Check local permits, electrical rules, setbacks, and buried utilities. Ask a qualified professional to review uncertain connections. DIY requires careful measurements, not just confidence.

How should I choose the installation site?

Watch the area during different times of day. Record shadows from trees, fences, and nearby buildings. Check slope, drainage, soil depth, and electrical distance. Seasonal shadows can be easy to miss.

How do I plan the panel layout?

Draw the exact panel dimensions on graph paper. Include space for clamps, cables, cleaning, and thermal movement. Mark the layout with stakes and string. Do not guess rail spacing.

What affects the rack’s structural design?

The design must handle panel weight, wind, snow, rain, and soil movement. Material strength and corrosion resistance also matter. Steel or aluminum may work when properly selected. A strong-looking frame can still fail.

How important are the posts and concrete footings?

They are critical to the rack’s stability. Align posts carefully before attaching rails. Footing depth depends on soil, frost movement, wind, and snow conditions. An undersized footing is a serious weakness.

How can I protect wiring and electrical connections?

Keep cables away from sharp metal edges and standing water. Use approved conduit for underground wiring. Protect cable runs from animals and accidental damage. Follow applicable grounding requirements.

What should I inspect after installation?

Check every bolt, rail, post, and brace. Tighten connections to the specified torque. Confirm the panels remain aligned and service space is clear. Inspect again after strong wind or heavy rain. My original plan might need revision.

Conclusion

Can I build my own DIY solar ground mount rack? Yes, with careful planning, suitable tools, and a clear understanding of the project’s structural and electrical requirements. A DIY ground mount rack is a frame that supports solar panels above the ground, allowing them to be positioned for good sunlight and easier maintenance. Before building, evaluate the site, including soil conditions, drainage, shading, wind exposure, panel orientation, and available space. Then determine the number of panels, rack dimensions, foundation method, tilt angle, and load capacity.

The construction process typically involves preparing the ground, setting secure posts or foundations, assembling the support frame, and attaching the panel rails. Use corrosion-resistant structural materials, appropriate fasteners, measuring tools, drills, levels, and safety equipment. After mounting the panels, route and protect the wiring, maintain proper cable organization, and connect the system according to the design. Finally, inspect every fastener, anchor, connection, and grounding point, and verify that the rack is stable and the array is safely secured before operation.

Liam

Liam

Liam is a dedicated marketing professional with a profound expertise in the industry, where he excels at highlighting the unique advantages of our core products. With a keen understanding of market trends and consumer needs, Liam frequently updates our company’s professional blog, providing......