How to install solar panels on a shed roof is no longer a niche question in 2026. Small sheds now support lighting, tools, pumps, security cameras, and occasional electric-vehicle charging. Yet a shed roof is not simply a smaller house roof. Its framing, roofing material, pitch, and exposure can change the entire installation plan.
Solar educator and industry writer Andy Sendy offers a useful reminder: “The roof comes first; the panels come second.” That principle deserves attention. Before lifting a panel, inspect the rafters, roof sheathing, flashing, and fasteners. A sagging roof cannot safely carry a new solar array. Even a compact 400-watt panel can create serious wind pressure when mounted incorrectly.
This guide explains how to install solar panels on a shed roof with practical 2026 considerations. You will examine sunlight, roof direction, shading, panel layout, mounting rails, cable routing, grounding, and system sizing. You will also see where batteries, microinverters, or a separate charge controller may fit.
Small details matter. A misplaced penetration can drip onto stored tools after the first heavy storm. A shaded panel can reduce the output of an entire string. An undersized cable can waste energy and create heat.
Some projects look easy.
They are not always easy.
A careful installation should follow the equipment manufacturer’s instructions and applicable local electrical requirements. Professional inspection may also be sensible, especially when the shed connects to household wiring. This guide is practical, but it is not a substitute for structural or electrical judgment. Even experienced installers sometimes revise their first plan after opening the roof.
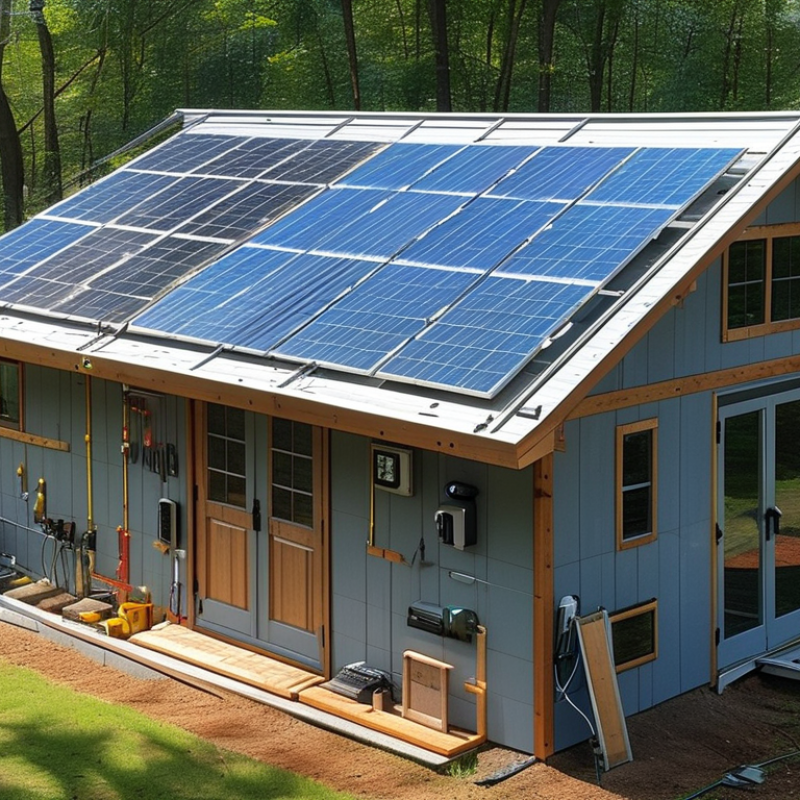
Before planning panel placement, inspect the shed roof as a structural system. Look for soft plywood, dark water stains, lifted fasteners, sagging rafters, and insect damage. Press gently near the eaves. Spongy decking is a warning sign. Measure rafter size, spacing, span, and support points inside the shed. A roof that looks sound from the ground may hide weakened timber.
The roof pitch affects drainage, wind exposure, and mounting hardware. Low-slope roofs may hold standing water beneath poorly sealed penetrations. Steeper roofs can shed water better, but they increase wind forces and installation risk.
Confirm the roof can support an additional 15–20 pounds per square foot, including panels, rails, attachments, snow, and maintenance loads. This figure is not automatic. Solar equipment often weighs less, but local snow and wind conditions can change the calculation.
I once focused too quickly on panel orientation and missed a cracked rafter near a wall plate. That mistake changed the entire layout. Use a structural assessment before drilling anything.
A qualified building professional can review the framing and confirm the required safety margin under current local rules. Also check whether the shed foundation can transfer these loads without settlement. A strong roof is not enough. The supports below matter too.
Before installing panels on a shed roof, measure daily electricity use rather than guessing. A 400–450 W panel produces about 1.3–1.5 kWh daily under four peak-sun hours and 20% system losses. Five panels could therefore deliver roughly 6.4–7.2 kWh per day. Actual results vary.
Use this formula: daily energy need ÷ panel output. For example, a shed using 4 kWh daily may need three 400 W panels, assuming similar sunlight. The National Renewable Energy Laboratory’s PVWatts documentation recommends accounting for temperature, wiring, inverter, and soiling losses. Its estimates are useful, but roof shading can make them optimistic.
Efficiency changes the space required. The 2024 Fraunhofer Photovoltaics Report places many commercial modules near 20–23% efficiency, while older or lower-cost products may approach 15%. A 450 W panel at 23% efficiency usually needs less roof area than a 400 W panel at 15%. The IEA PVPS 2024 Trends report also identifies continuing improvements in commercial module performance.
Leave clear access around roof edges. Check timber condition, rafters, wind exposure, and snow loads before adding weight. A small shed roof can look strong but still flex under uneven loading. I would not rely on the panel count alone. Recheck winter sunlight, because four peak-sun hours may become two or three. A simple spreadsheet with monthly estimates is safer than one annual average.
Estimated annual electricity production is based on four peak-sun-hours per day and an 80% overall system performance factor, including temperature, wiring, inverter, and dust losses. A 400 W panel produces approximately 467 kWh per year, while a 450 W panel produces approximately 526 kWh per year. Actual results vary with roof orientation, shading, tilt, local sunlight, and the panel efficiency range of approximately 15–23%.
Designing a solar layout starts with the roof, not the target system size. Measure the usable roof length and width, excluding edges, vents, skylights, and weak sections. A typical 400-watt panel needs roughly 2 square meters. Therefore, a 1 kW system may need three panels, while a 5 kW system may require twelve or thirteen. Leave working clearance around the roof perimeter. Do not fill every open space.
A south-facing roof usually offers strong annual production in the northern hemisphere, but east-west layouts can use morning and afternoon sunlight better. Mark shadows from nearby trees, fences, and the shed ridge during different seasons. Even a narrow chimney shadow can reduce output across a panel string. Keep panels aligned in clean rows, with enough spacing for airflow and maintenance. A simple drawing on graph paper can reveal fit problems early.
I would check the rafters before choosing mounting points. Panel weight, wind uplift, and snow load must match the shed structure. My first layout is rarely perfect. A smaller 2 kW array may be safer than forcing 5 kW onto a fragile roof. Use a qualified installer to verify structural capacity, electrical protection, grounding, and required permits. Cable routes should avoid sharp metal edges and standing water. Leave room for future access, because repairs become awkward when panels cover everything.
How to Install Solar Panels on a Shed Roof in 2026?
A shed roof can support solar panels when its rafters, sheathing, and roofing remain sound. Check for soft timber, loose fasteners, and water stains before lifting any equipment. Mark each rafter from inside the shed. Rails must fasten into structural wood, not only thin roof panels. Keep the panel array clear of roof edges and nearby branches.
Install flashing beneath the roofing layer at every attachment point. The flashing should direct water downhill, while approved sealant provides an additional barrier. Do not depend on sealant alone. It ages, cracks, and sometimes hides poor workmanship. Rails should sit level, with mounting bolts tightened evenly. Leave enough space beneath the panels for airflow and future inspection.
Bond the metal rails, panel frames, and mounting hardware with a continuous grounding path. Follow the current electrical code for conductor size and connection methods. Use sunlight-resistant 10–12 AWG solar wire for the array circuit when the design permits it. Protect cables from sharp metal, standing water, and abrasion. Secure loose loops beneath the panels. Small details matter.
Route the conductors through weatherproof entries and provide strain relief at the shed wall. A licensed electrician should verify polarity, voltage, overcurrent protection, and the grounding electrode system. Cable sizing can change with distance, temperature, and conduit fill. Measure twice. I would still recheck every roof penetration after the first heavy rain, because a dry installation day can conceal a slow leak.
| Installation Area | Recommended Planning Data | Safe Installation Method | Important Checks |
|---|---|---|---|
| Roof and Shed Assessment | Confirm the roof can support the panel, rail, fastener, snow, wind, and maintenance loads. A typical crystalline-silicon module weighs approximately 18–25 kg and often covers about 1.7–2.2 m². | Inspect rafters, trusses, sheathing, roofing, water damage, rot, and corrosion before marking attachment points. Reinforce framing when required by the structural design. | Check local wind and snow loads, roof age, roof pitch, access clearance, and whether the shed foundation and walls can transfer the added load safely. |
| Panel Layout | Leave enough space for roof edges, flashing, clamps, cable routing, and maintenance. A practical planning gap between adjacent modules is commonly about 10–20 mm, subject to the module instructions. | Keep module rows aligned with the roof framing where possible. Do not block vents, skylights, roof drains, or required emergency access paths. | Verify the final string voltage remains within the inverter or charge-controller operating range at the lowest and highest expected temperatures. |
| Rail Positioning | Place rails within the module manufacturer’s approved clamping zones. Many modules require clamps a specified distance from each end; use the exact module installation instructions. | Install rails perpendicular to the roof framing or as required by the racking design. Keep rails straight, level, and supported at every engineered attachment location. | Do not rely on roof sheathing alone unless the mounting system is specifically engineered for it. Use approved structural fasteners and avoid over-tightening. |
| Flashing and Waterproofing | Every roof penetration requires a compatible flashing assembly, seal, and installation method suitable for the roof covering and local weather conditions. | Locate penetrations over structural members. Lift or remove roofing material as needed, install the flashing so it sheds water downhill, then restore the roofing layers in the correct overlap sequence. | Do not depend on surface sealant as the primary waterproofing method. Inspect the underside of the roof for leaks after installation and after the first significant rainfall. |
| Rail Fasteners | Fastener diameter, embedment depth, spacing, and torque must come from the racking and structural design. A generic torque value should not be substituted for the specified value. | Pre-drill where required, keep fasteners centered in the framing, and use corrosion-resistant hardware compatible with the roof and racking materials. | Confirm every fastener is fully seated without crushing the flashing or distorting the rail. Record the final torque where a documented inspection is required. |
| Module Clamps | Use end clamps at the outside edges and mid clamps between modules. Clamp type and allowable module thickness must match the module frame and racking system. | Install clamps only in the approved clamping zones. Tighten evenly with a calibrated torque tool and keep clamps clear of glass and junction boxes. | Check that modules are fully supported, do not rock, and have the required thermal expansion gaps. |
| Equipment Grounding and Bonding | Bond exposed metal module frames and rails using listed bonding devices or an approved integrated bonding system. Equipment grounding conductor size depends on the overcurrent protection and applicable electrical code. | Create a continuous, corrosion-resistant grounding path from the array structure to the system grounding point. Use compatible conductor, lugs, washers, and terminals. | Remove coatings only where the grounding hardware requires metal-to-metal contact, protect against corrosion, and verify continuity with an appropriate test instrument. |
| Solar Wiring Size | 10 AWG copper PV wire is commonly selected for longer runs or higher current, while 12 AWG may be suitable for shorter, lower-current circuits. Final sizing must account for allowable ampacity, temperature correction, conduit fill, voltage drop, and local code. | Use sunlight-resistant, wet-location-rated PV cable with insulation suitable for the system’s maximum voltage. Keep positive and negative conductors routed together where practical. | Never select wire size by distance alone. Confirm the module short-circuit current, design current, maximum system voltage, ambient temperature, and installation method. |
| Cable Management | Keep cables elevated from the roof and away from sharp edges, standing water, hot surfaces, moving parts, and locations where rodents can reach them. | Secure cables with UV-resistant clips or approved cable-management hardware. Maintain bend radii specified for the cable and connectors. | Do not leave connectors lying on the roof, place connectors under tension, or mix incompatible connector types. Confirm every connection is fully mated. |
| Roof-to-Shed Conduit Entry | The entry point should be high enough to avoid splash water but positioned to maintain a downhill drainage path and a serviceable cable route. | Use a listed weatherproof entry fitting or flashed penetration. Provide a drip loop where appropriate and protect wiring from abrasion at the entry point. | Seal the penetration without trapping water. Confirm conduit support, bend radius, pull access, and protection from physical damage. |
| DC Disconnect and Overcurrent Protection | Use disconnecting means and overcurrent protection when required by the system design and local electrical code. Ratings must exceed the circuit’s maximum voltage and design current. | Install equipment in an accessible, dry, protected location with clear labeling and adequate working space. | Do not use ordinary AC-only switches or breakers on a DC PV circuit unless they are specifically rated for the application. |
| String and Polarity Verification | Before energizing, compare measured open-circuit voltage with the expected string voltage and verify polarity at every circuit termination. | Test one string at a time using appropriately rated test equipment. Keep connectors covered and avoid working on exposed energized conductors. | Solar modules produce voltage whenever illuminated. Use insulated tools, appropriate PPE, and follow the shutdown sequence for the equipment. |
| Final Inspection | Review roof attachments, flashing, rail alignment, clamps, grounding, wire routing, labels, and equipment clearances before commissioning. | Photograph concealed wiring and record circuit measurements, torque values, equipment ratings, and test results for future maintenance. | Arrange inspection or approval when required. Have a qualified solar electrician verify the final design, connections, grounding, and commissioning procedure. |
Safety note: Solar PV circuits can remain energized in daylight and may produce hazardous DC voltage. Structural calculations, electrical protection, grounding, wiring, and permits should follow the applicable 2026 local code and be reviewed by a qualified professional.
Installing solar panels on a shed roof in 2026 requires more than secure mounting. Before lifting a panel, inspect the roof covering, rafters, and fasteners. Measure twice. Confirm the roof can handle panel weight, wind, and local snow loads. Check current building, electrical, fire, and utility requirements with the relevant authority. Permit rules may differ between grid-connected and off-grid systems. Use a qualified electrician for circuits, grounding, and utility connections.
Place the inverter in a shaded, dry, ventilated area, preferably close to the array but away from stored chemicals or flammable materials. Keep required clearances around it. Confirm that panel voltage and current stay within the inverter’s operating limits. Set the system for the correct grid frequency, export rules, and battery limits, if applicable. Label disconnects clearly. Cable routes should avoid sharp edges, standing water, and loose loops. Small oversights often cause later faults.
Before energizing the system, check polarity, connector seating, insulation resistance, grounding continuity, and open-circuit voltage. Record each reading with the test date. A qualified person should verify final connections. Watch the inverter display for abnormal voltage, temperature, or fault messages. Inspect the roof and cables monthly, especially after strong winds. Clean panels only when safe, using soft water and a non-abrasive tool. Once a year, check fastener torque, corrosion, roof leaks, and inverter logs. No checklist catches everything; unusual readings deserve investigation, not guesswork.
: Check for soft plywood, dark stains, lifted fasteners, sagging rafters, and insect damage. Press gently near the eaves. Spongy decking needs attention.
Confirm the roof can carry an additional 15–20 pounds per square foot. Include panels, rails, attachments, snow, and maintenance loads. This capacity is not automatic.
Low-slope roofs may collect water around poorly sealed penetrations. Steeper roofs drain better but face stronger wind forces and higher installation risks.
Measure rafter size, spacing, span, and support points. Inspect wall plates and foundation conditions. A strong roof cannot compensate for weak supports below.
A 400–450 watt panel may produce about 1.3–1.5 kilowatt-hours daily. Five panels could provide roughly 6.4–7.2 kilowatt-hours.
Divide daily electricity use by estimated daily panel output. A shed using 4 kilowatt-hours daily might need three 400-watt panels.
Yes. Panels around 20–23% efficiency usually need less area than 15% models. Measure roof space before choosing a panel count.
Not completely. Winter sunlight may drop to two or three peak-sun hours. Shading, heat, wiring, inverter losses, and dirt also reduce output.
Leave access around roof edges. Keep room for inspection and maintenance. I once focused on orientation and missed a cracked rafter.
Review the framing and load limits before drilling. A qualified building professional can confirm structural safety and local requirements. My first layout assumption could be wrong.
Learning how to install solar panels on a shed roof begins with checking whether the structure is suitable for the added weight. Inspect the roof’s age, framing, surface condition, pitch, and ability to support an estimated solar load of 15–20 pounds per square foot. Next, calculate household or shed energy needs using 400–450-watt panels with typical efficiency between 15% and 23%. This information helps determine whether a 1–5 kW system is appropriate and how many panels can fit safely within the available roof area.
A practical installation plan should include balanced panel placement, secure rails, weather-resistant flashing, proper grounding, and correctly sized 10–12 AWG solar wiring. After installation, complete the required 2026 electrical and building-code checks, configure the inverter, and test system performance under safe conditions. Regular maintenance should include inspecting connections, checking for roof leaks or damage, cleaning panels when necessary, and reviewing energy output periodically to ensure reliable long-term operation.

Trike Solar